Wednesday, 25 November 2015

Week 4, Transcribing Caro Project

This week I was doing ceramics. During this workshop, I would need to use some my maths skills to work out the length because it get smaller by 10%. It was little hard because I have to work out what kind of length I need for it to fit but I also have an second plan. If the clay doesn't fit then I would use the wood to make it fit. After done all the planning, it was time to start making my sculpture.

First thing I was having to choose what kind of clay I would like to work on and I pick earthenware. Reason is because I want my piece to looks nature and this one already have a brown-red colour, which it would make it easier not to colour it and make it nature.

This is an photography, showing what I did, how I did it.


Week 3, Transcribing Caro Project

((Half Term))
In half term, we were also been giving an task to do. Continue production of primary search pages from Caro exhibitions and secondary search on other sculptor; such as Alexander Calder, David Smith and others.

Mostly I was working on Caro's work and how to make my sketchbook looks more interesting. It didn't turn out amazing but at the same time, it doesn't look bad. It was in stranded quality.


((Back from Half Term))
Back to college. I was learning what's maquette mean? Working on my scutplure plans and create an maquette. Everyone was having to do 3 designs and choose one you would like to do. I only create two maquette, out of the 3 designs. Reason is because I wanting to see what it would looks like if it turn into 3d. The first one was good but I like the second one I made, because I finds it more active and after I included every workshop materials together and it match perfectly.

Starting working on the workshop. My first workshop is 3D wood work.
I didn't take my design sheet but I took my maquette with me. Things got changed after went in workshop and do them. I add more part onto my sculpture but things still stay the similar as the ordinal design.  During this workshop, I was been asked what kind of wood I would like to work on? I didn't know much about the wood so I asked the tutor. He giving me an great suggestion, such as what kind of wood would be the best to add the texture on. Another thing I didn't expecting while doing this piece was adding more texture making by some of the wood and making Alexander Calder's work.

This is some photography I took during the workshop. It isn't in the order but this is showing what I did and what does it look like.


Week 2, Transcribing Caro Project

After coming back from the trip, I would have to go in 3D wood work induction for 3.5 hours. Reason this is because to make sure we learn what's each things do in the workshop and the most important things was health and safety for everyone. Every time there are induction, there would be at least 5 students would need to go in and learn about 3D wood work.

The first thing I would need to learn was What's PPE mean? It mean Personal protection equipment. When we are using  any machines in the wood shop, there would be a sign telling you, you must worn them no matter what. Reason is because there are  eye protection, hearing protection or foot protection to protect yourself from getting injured while still in the workshop.

Another thing is workshop glossary. Telling us what each machines called, where it would need to go and what does it do? I used to be in wood work before so I know quiet lot of things in the workshop already but there also more stuffs I haven't try or learn how to use it. The induction was helping a lot with understand what each machines does, health and safety and why did we need to know all of this.

After done with 3D wood work induction, We were been learning how to make your sketchbook looks interesting, why it is important part of your coursework project and how to annotate an art sketchbook. I personally think making my own sketchbook looks interesting is my weakness, reason is because I think I'm not very creative, I like things to be too perfect but sketchbook actually an journey. Showing what you have use to develop your art skills, your research of what kind of artist have I been look into and understand they art theme. I already know how to annotate my work, reason is because I used to do art in previous year in college.

Sketchbook is also your personality. Showing how you would put your work on the sketchbook, how would you develop them, what kind of style have you used to show you been looks into that artist's work and how did you use their artwork and turn it into your own ideas.

Week 1, Transcribing Caro Project


During the YSP/Hepworth trip, after arrive to the gallery and we were been giving a tasks to do during the trip. The first task was taking a photography of every sculptures and choose one you interest, take around 16 times in all angles. I pick one from the YSP and another Hepworth,
 

This is the first one I choose of all the sculptures. Reason is because there are a lots of part I would like to sketch out, negative space and many different part that make this sculptures.
 

This is some part from the folding sketchbook that I bring with me during the trip, this is another task that we has been given. We were been giving two folding sketchbook with 16 parts and looking at sculpture of any of my choice, spending some times on them. This isn't just normal sketch but it also showing different techniques and materials affect eachother.


 This is an sculpture showing outside of YSP. One of Caro's work that also looks similar as the one I choose to do, reason is because of the shapes and how it was been connected to eachother. However they are using an different materials. What I like about the scuplurse was the simple design but with affect to dark and light.
It was quiet interesting because how this trip isn't just learning about the artist's artwork but also wanting us to experiencing what does the sculpture really make out of, different between primary researches when you can actually see the sculpture within your own eyes. Another reason is because different between images and seeing the artwork with your own eyes can make lots of different, you can see more details when images can't catch those details.

Another thing that I learn was some artist's work may have the same style and way they create the work is also similar but just depending on how they put connect all the piece together.


Sunday, 18 October 2015

"Hands On Project Evaluation

"Hands On" Evaluation 
Through this project, I was looks into elements and principles of design. To help me keep in track with all the definition, we were giving a task to create 14 glossary pages using different materials and techniques within each glossary page. Sometime I would also need to get my ideas from secondary resources such as artist or Pinterest, which I used to find more techniques from Pinterest but I'm also using primary resources such as taking photo of my own hand, family or families. Using all the techniques and materials to match the meaning of each in elements and principles, I came to realise what kind of affect each piece has. For example Proration and rhythm, even though I'm using a same material but there different because rhythm is about movement and proration is about scaling so they would have different meaning and techniques within each piece.

During the each workshop, I was looks and learns new stuffs in the workshop and even though some of them I may already have known, yet I still learning quite few in the each workshop. Such as in Photography, this is my first time learning about photography and it was quite difficult but in the end, I understand most basic and how camera can be affected the photo and different settles with different angle can also change style of the images. Next workshop was ceramic, even though I already know what to do in this workshop but I still haven’t learn quite a few stuffs about how to made an sculpture without them falling apart and the tutor was taught me how to remove the airs from clay, which it was really helpful because she also explaining the reason why we have to removes the airs from the clay, it may make the sculpture explored after it got burn but the most important things that I thought it was quite useful was improving my solving problem skills because I have to make sure the sculpture doesn’t fall and actually stick each parts together. 3D woodwork taught me how to plan my work out and thinks about the next step before do it. Print-making taught me the key term with meaning and what’s chine colle. Another thing is, it help me remembering that I should just keep my imaginations open wild because with zentangle, I need to have my open to create a patterns from my head.  I already know about ow to screen printing and batik but what I learned about textile was how to heat transfer, puff binder and paper making and embroidery. How puff binder and screen printing is quite amazing together when become one and heat transfer was really great even though I have to be careful while using it but totally worth learning it.


Even with all those things that I have learned, I still have a lots to improve, such as my time management, organisation and being creative. The reason why I think I have problem with those skills, is because at first, I couldn't manages get everything done in time, even though done all my blog, 10 pages on my sketchbook and everything completed in the workshop but doing 20 glossary pages was taking too much times, it wasn't really worth it because the quality wasn’t in the excellent standard, next time I will improves it and write what need to be done in each week. I’m having quite a lots of problem with being creatives even though I mostly using my own ideas to create my artwork but after looks into other people works in Pinterest, I always wanting to change my ideas because they got a better quality work than I do, which causing me to have trouble with making my own decision but I still enjoy doing it, even though it wasn’t great like an artist but I been taught different things in each workshops and explored the materials with different techniques. 

Elements and Principles of Design

During the first and second week into the project, we were introduced to element of design and we were asked to made an glossary contain from those elements with every each of them will have an definitions. Elements and Principles of Design, there are 7  of art meanings for each designs so that make up 14 elements.

Elements of Design;
Line / Shape / Space / Texture / Colour / Value / Form
Learning to understand the different techniques and the uses of materials also explaining each elements definitions for all the glossary pages. For this start, i choose to do colour and texture because it's what I'm usually like doing the most and thinks it would be the easiest one, out of all the elements.

Principles of Design;
Pattern / Contrast / Emphasis / Balance / Proposition / Harmony / Rhythm.
I'm starting off with patterns and emphasis because of my personal interests so i decided to do those two in the class then i will completed other in my own times.

 Elements of Design:

Materials i used on colour is acrylic paint and pencil. At first i free draw the hand with pencil, looking at my own hand and it's take awhile to get it right but i still done it. After that i draw with the paint.
Texture, materials i used is line paper, hard brush and acrylic paint. However i made the mistake at first by trying to make it into collage but end up realise it's wrong so I tried to rip it off, make the background has texture and stick the line papers on the hands shape.

The materials used on Space was ink colour and acrylic pain. At first i draw a hands with pencil, adding details etc. and after that using end of the brushes, i draw onto the pencil and colour the background with black paint to create those spaces.
 Shape, i wanted to use different materials but similar background colour. techniques that i used was cool and warms colour and to make it into shape, i draw the position of the hand in shape on the middle. I used chalk to colour the hands and oil pastels to covers the background. 

Line, two materials that i use was broad/liner and water colour. Drawing the hands with liner/broad and after that carefully colour the background with watercolour.
Form, materials that i used was pencil to draw the basic of hand, after that i paint it and finish off with colour the background with water colour.

Value, material that i used is pencil and broad. Picking up the deep lines with dark pencil and lightly add little details with lighter pencil.


Principles of Design

Patterns, i used started the pencil to draw simple basic of the hand with patterns and after that, draw on top with broad/liner after completed that, I'm trying to make the background also become patterns so i add draw an background with colour pencil.
Similar techniques and materials as patterns. 

Emphasis, using paint to colour the background and hand.
Harmony, At first i was drawing the hands with pencil and went over it with acrylic paint then using sponge with colour paint of top, it doesn't looks right so i draw the outside with ink.

both have same techniques and material. All i used was pencil to do a quick sketch and after that i draw the hand with ink, using bottom of the brush, adding the details with ink as well.

Using pencil and acrylic paint, drawing the hands with pencil and after paint on top.

Week 5, Hands on Project

Workshop: Textile
Last week of hands on project. 
In this class I was learning how to Paper making, Screen printing and Batik.
Beginning of the section, our tutor was telling us about health and safety and what we would be doing, after that we can start working on what we wanting to do between screen printing and batik. I choose to do batik because it's quick and easy to do.

This workshop is one of my favourite workshop because i used to do work in this workshop for my final piece from last week so i know quite few things in this workshop. However i also learning new techniques in this lesson, such as how to paper making, puff binder, embroidery and heat transfer. 

Batik
Materials that I need or was be using is procion dye, paint paint brush, wax pot, wax tjanting tool, paper and fabric. Even though it may be hard to draw with free hand but it's also ok to draw with pencil but it's must be really light. First thing that i did is drawing an hand lightly with the pencil, after that, i was making sure the wax in wax pot is all melted and ready to be use and another thing to remember is tjanting tool is also warm. After making sure everything is ready, I started to draw on the paper, this techniques require a lots of patient because the wax is quickly dry after it got remove from the wax pot so i always have to put the tjanting back into the wax pot, then i paint on top using procion dye to make it looks colourful and interesting.

Screen Printing
After done a few of batik, i choose to do screen printing. 
Material that i would need to be using is squeegee, hose pipe, screen, fabric and black/white paper. First thing that i did was puts blank paper under the screen, after that i put the print on the screen, after that use the squeegee slides up and down 2-3 times, lift the screen up and then check your print. You should get the print that you wanted on screen.

Example of how to do screen printing:


Paper making
Material that i need to use is frame, paper pulp, j-cloth and sponge.
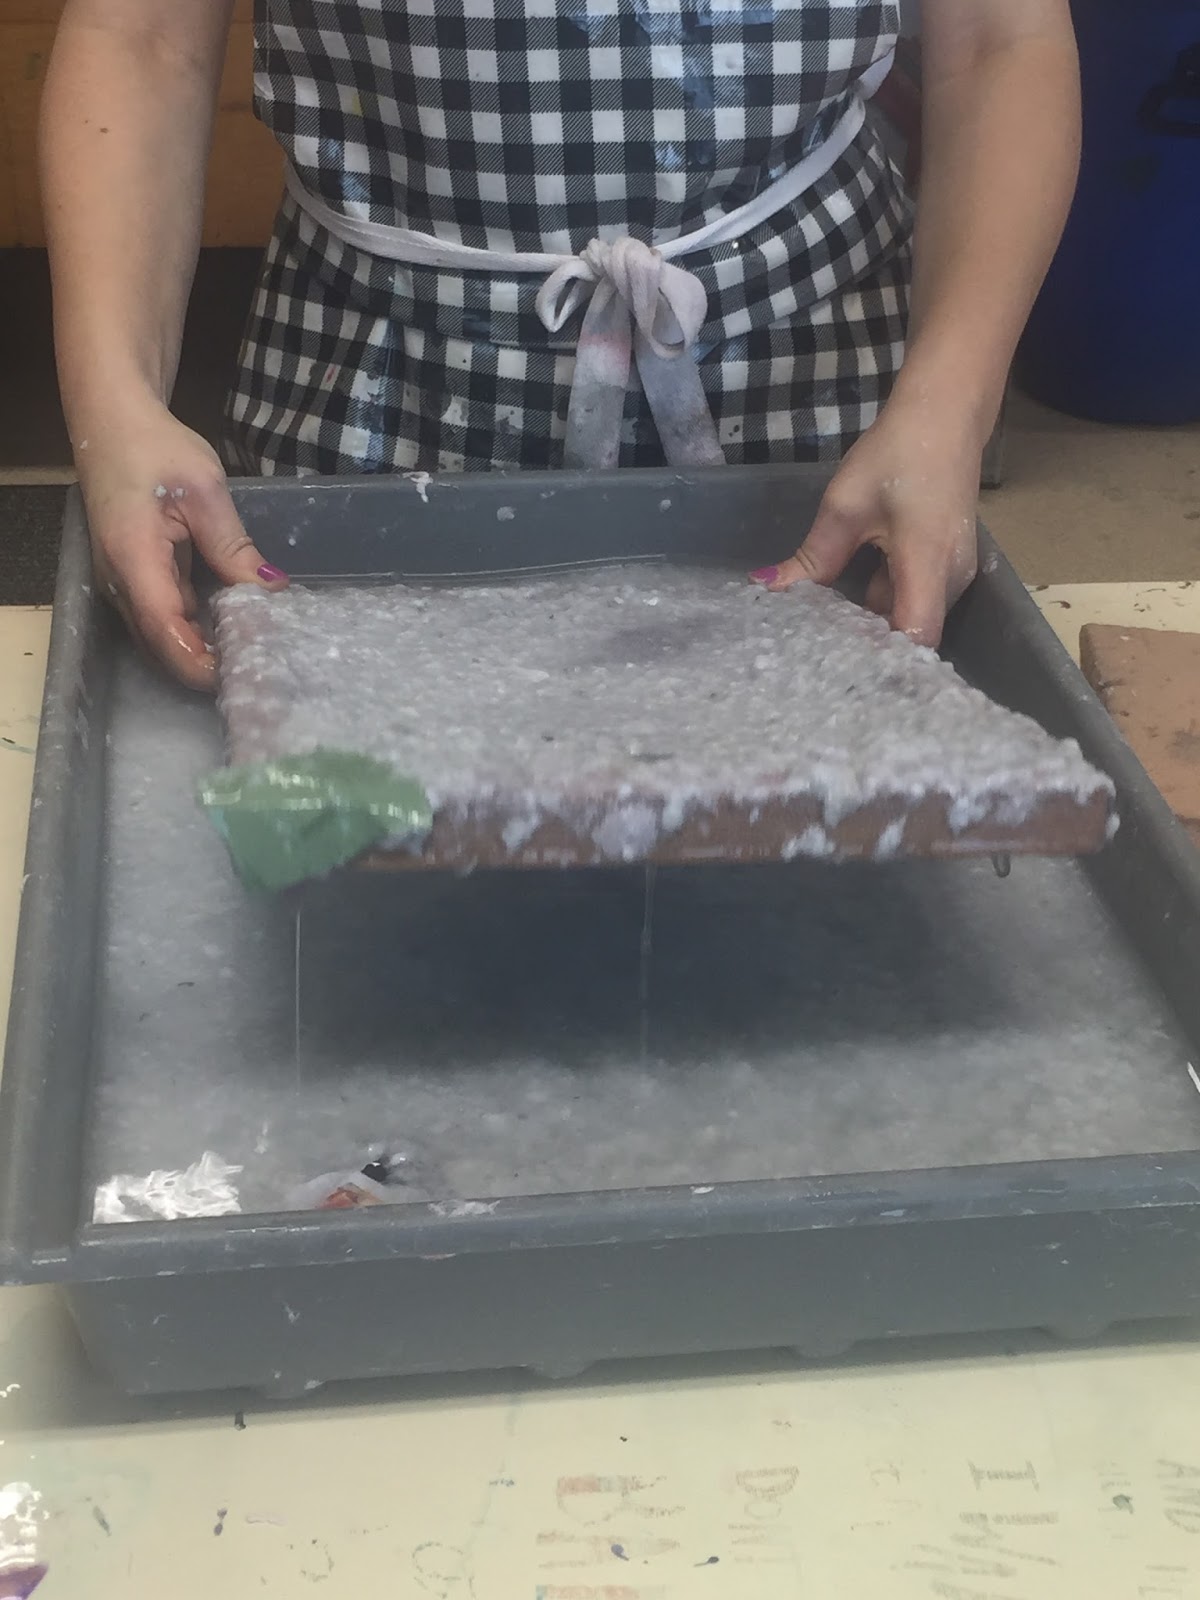
the first thing that i did was getting all the materials ready , put the paper pulp ready in the water, after that get a frame, put it down in the draw where paper pulp is in, lift it up trying to get rid of the water then cover it with j-cloth then flip the frame to other side on the table, use a sponge to get rid of the water from the frame, gently remove the frame from the paper pulp and i got the my own paper making. All I have to do right now is waiting for it to dry before i can use it.

Example of how to make paper making:


Example of how i made Heat Transfer: 


Health and Safely